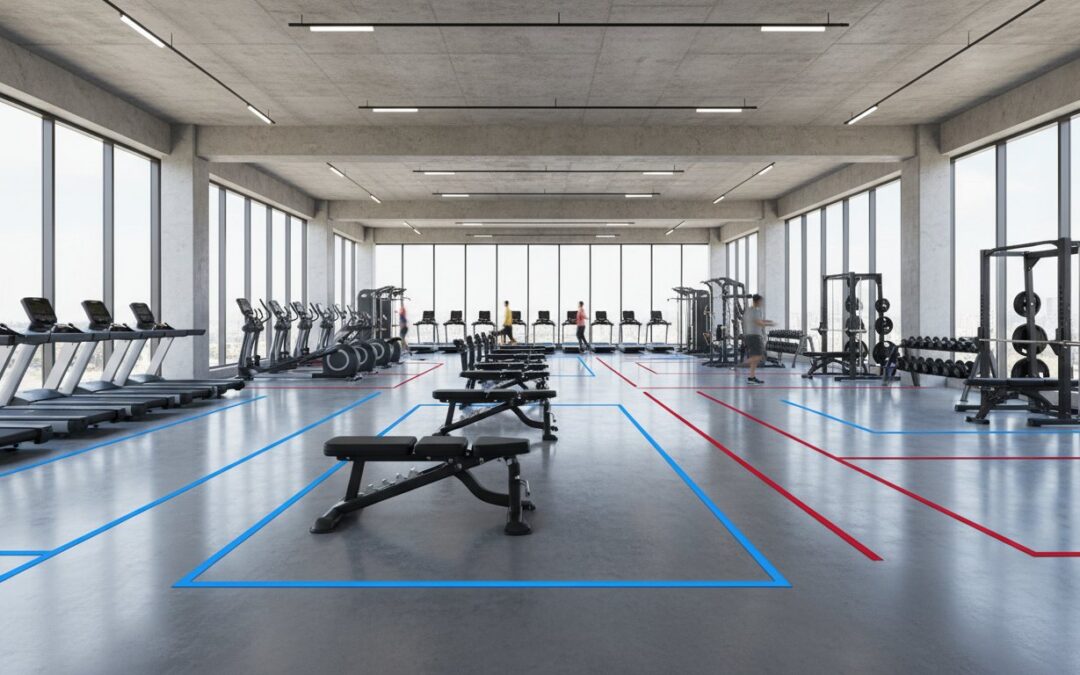
What if your current floor plan is actually the biggest barrier to your membership retention? You likely know that a cramped, disorganized facility isn’t just an aesthetic issue; it’s a liability that frustrates your members and leaves premium equipment like Life Fitness treadmills or StairMaster StepMills underutilized. This commercial gym layout planning guide provides the expert strategies you need to engineer a high-performance environment that maximizes every square foot for safety, flow, and professional-grade ROI.
Mastering a layout requires more than just moving machines around. It’s about understanding traffic “arteries” and strictly adhering to the 2010 ADA Standards, including the 30-inch by 48-inch clear floor space required for wheelchair access. We’ll walk you through balancing the 2026 demand for massive strength training zones with the precise safety clearances needed for Cybex Arc Trainers and Concept2 rowers. You’ll learn how to transform your facility into a logical, high-traffic space that mirrors the world’s elite health clubs. Secure your investment by turning your floor plan into a strategic business asset.
Key Takeaways
- Group equipment by metabolic demand and noise level to eliminate floor bottlenecks and improve the member experience.
- Calculate precise “Dwell Zones” for high-performance machinery to ensure safety buffers and compliance without wasting square footage.
- Utilize this commercial gym layout planning guide to execute a professional 5-step facility audit, from measuring HVAC ducts to placing your heavy anchors.
- Secure premium aesthetics and long-term durability by integrating verified, refurbished equipment from industry-leading brands like Star Trac and Life Fitness.
The Business of Space: Why Commercial Gym Layout Planning is Your #1 Retention Tool
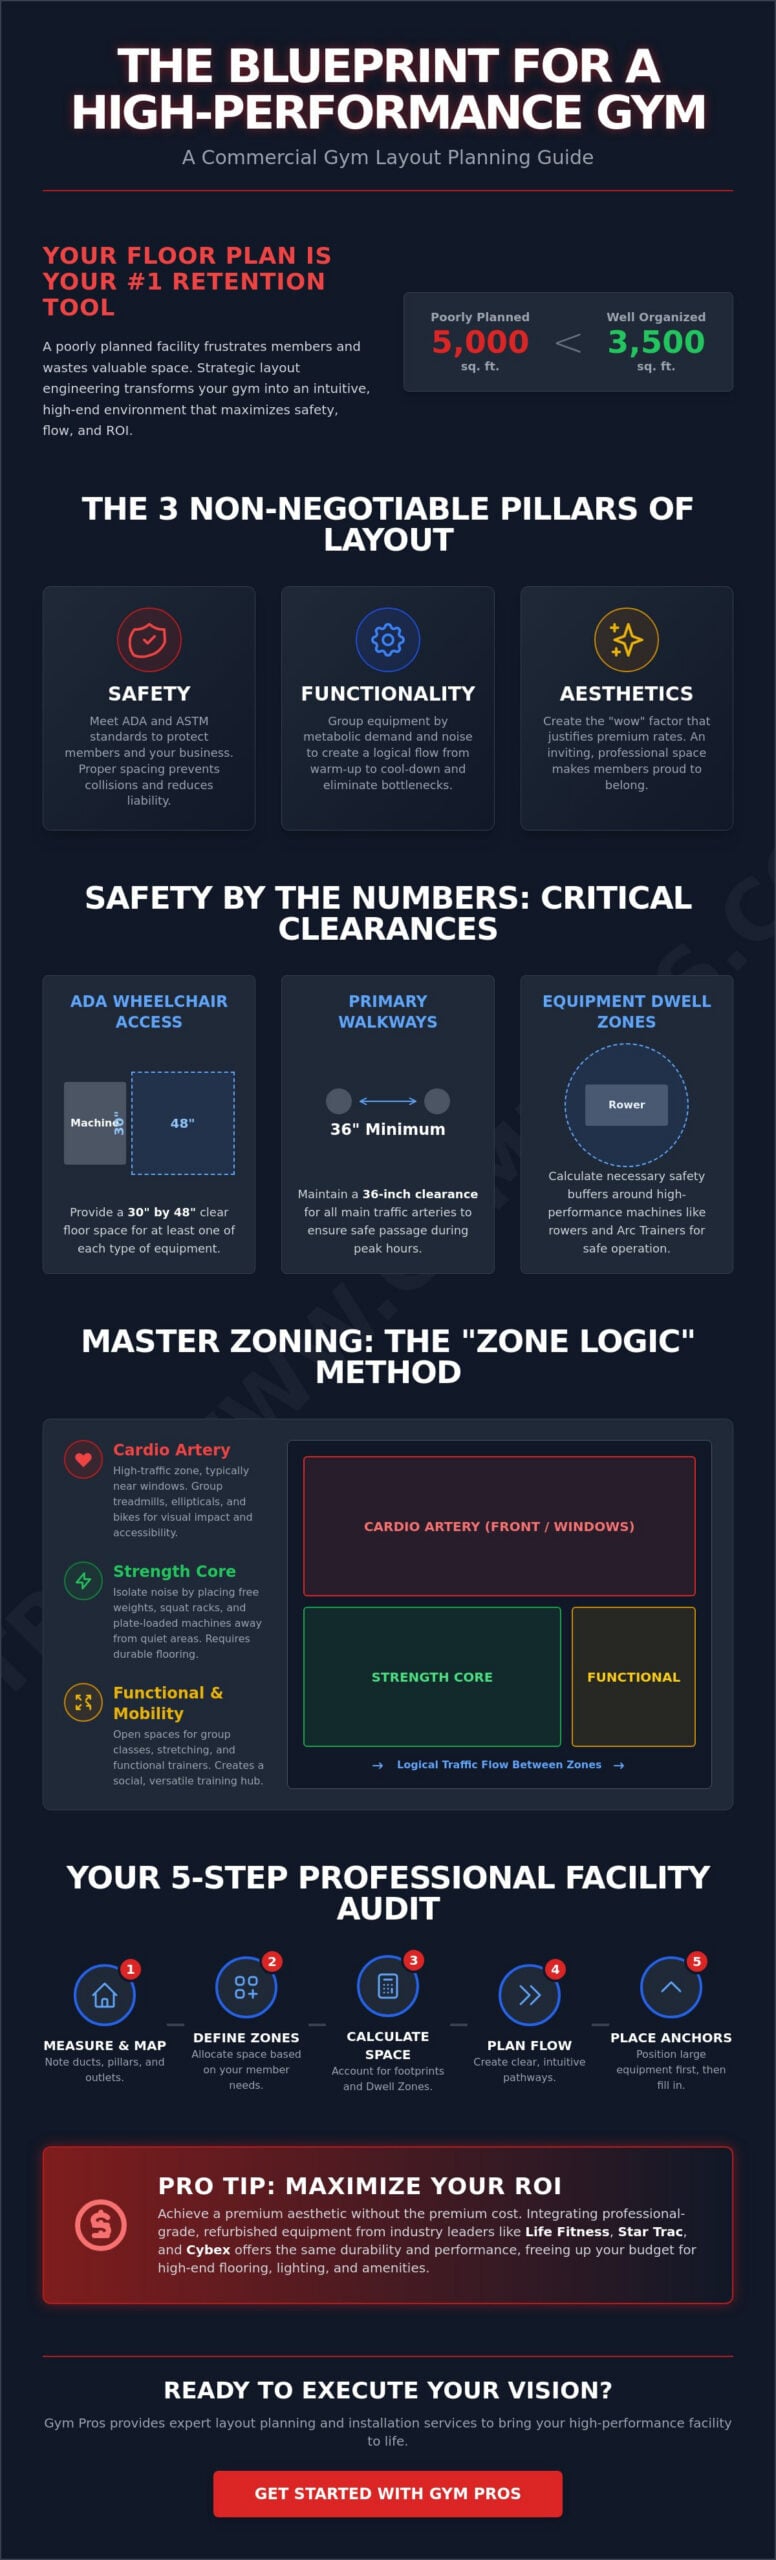
Commercial gym layout planning is the strategic engineering of your facility’s floor space to optimize member movement and equipment utilization. It isn’t just about fitting as many machines as possible into a room. It’s a high-stakes calculation. A poorly planned 5,000-square-foot facility often feels more cramped and frustrating than a well-organized 3,500-square-foot boutique. This commercial gym layout planning guide will help you cross that “professional threshold” where your space feels expansive, intuitive, and high-end.
A successful plan rests on three non-negotiable pillars. First, safety ensures you meet ADA and ASTM standards to protect members and your business. Second, functionality dictates that you group common gym training zones by metabolic demand, ensuring a logical progression from warm-up to cool-down. Finally, aesthetics create the “wow” factor that justifies premium membership rates. Savvy insiders know they can achieve this elite look by integrating professional-grade, refurbished units like Star Trac cardio equipment or Life Fitness treadmills. These machines offer the same rugged durability as new models but at a fraction of the market cost, allowing you to allocate more budget toward premium flooring and lighting.
The Psychology of Gym Flow
Members decide whether they’ll renew their membership within the first 30 seconds of walking through your door. This “First Impression Zone” must feel open and inviting. Intuitive navigation reduces the “gym-timidation” often felt by new members. If a user has to hunt for a functional trainer or feels exposed while using a StairMaster StepMill, they won’t return. Design your layout to offer privacy in high-intensity areas while fostering social interaction in functional “pods.”
Safety Standards and Liability
In 2026, ADA compliance is a legal mandate that can’t be ignored. Your layout must provide at least one of each equipment type with a 30-inch by 48-inch clear floor space for wheelchair access. Primary walkways must maintain a 36-inch clearance to ensure safe passage during peak hours. Layout errors don’t just frustrate members; they increase your insurance risks and accelerate equipment wear. Proper spacing prevents collisions and ensures that your Cybex Arc Trainers and strength racks have the “dwell zone” required for safe, effective operation.
Master Zoning: Dividing Your Facility into High-Performance Training Hubs
Professional facility design relies on “Zone Logic.” This method groups equipment based on metabolic demand, noise levels, and user behavior to eliminate floor bottlenecks. By separating high-energy cardio from the heavy lifting area, you create a focused environment that caters to different training goals simultaneously. A core pillar of any commercial gym layout planning guide is the realization that your floor plan should dictate member behavior, not the other way around. Proper zoning ensures that a member performing high-intensity intervals doesn’t interfere with someone focused on mobility or heavy squats.
The layout should begin with a clear “Cardio Artery.” Placing treadmills and ellipticals near windows or entrance lines provides members with a view and keeps the most frequently used machines accessible. To maintain a safe environment, you must adhere to NSCA spacing and traffic flow guidelines, which help prevent collisions in these high-traffic zones. Organizing your space this way ensures that the “clank and bang” of the strength core remains isolated, protecting the acoustic comfort of the rest of your facility.
Cardio Zones: The Power of the Lineup
Visual impact is a major retention driver. Arranging a uniform row of Life Fitness treadmills near the front of the gym signals professional quality immediately. However, you must account for equipment height. Taller units, such as StairMaster StepMills, should be placed against walls or at the back of the lineup. This preserves sightlines and prevents the space from feeling closed-in. Always plan your floor outlets before bolting anything down; hazardous cord sprawling is a major liability that ruins a premium aesthetic.
Strength and Resistance Hubs
A logical strength hub flows from selectorized machines to heavy free weights. This progression helps beginners feel less intimidated while keeping the high-impact “clank and bang” zones concentrated in one area. Mirrors are essential here, not just for form, but to create an illusion of depth in smaller facilities. Savvy owners use functional trainers as versatile corner-fillers. These units provide hundreds of exercise options while occupying a small footprint, freeing up the center of your floor for high-traffic movement.
Finally, never neglect your functional and stretching pockets. These low-profile areas actually require the most open floor space per user to remain effective. If you are looking to secure elite equipment for these specific zones without the typical market markup, you can browse professional-grade inventory to find the right fit for your facility. By mastering these training hubs, you turn a simple room into a high-performance health club.
The Science of Footprints: Calculating Clearance and Traffic Flow for Pro-Grade Gear
Engineering a premium facility requires moving beyond simple floor measurements. You must calculate the difference between a machine’s static footprint and its “Dwell Zone,” which is the actual volume of space a member occupies during a set. While a Star Trac treadmill has a defined physical length, its Dwell Zone includes the necessary “Safety Buffer” to prevent injuries. This commercial gym layout planning guide prioritizes these spatial calculations to ensure your floor remains functional even during peak-hour rushes. Precise planning also accounts for floor loading; heavy strength racks and multi-gym stations exert significant point-load pressure that requires reinforced subflooring or high-density rubber tiling.
Cardio Footprint Cheat Sheet
Safety is the primary driver for cardio placement. For Life Fitness treadmills, the ASTM minimum clearance is 39 inches behind the unit, but industry veterans recommend a 6-foot “fall zone” to eliminate the risk of a member being thrown into a wall or another machine. When placing Cybex Arc Trainers or ellipticals, you must calculate the “pedal swing.” These units have moving parts that extend beyond the frame; failing to account for this leads to scuffed walls and mechanical interference. Conversely, Star Trac exercise bikes and Concept2 rowers offer the most compact footprints, making them ideal for filling gaps between larger “anchor” units.
Strength Machine Spacing
Strength zones require a different logic focused on maintenance and loading. For selectorized units from brands like Nautilus or Hoist, you need at least 24 inches of clearance around the weight stack. This ensures your staff can perform routine cable inspections and weight pin replacements without decommissioning adjacent machines. Plate-loaded equipment requires even more breathing room; you must plan for a “plate-loading radius” so members can safely slide 45-pound Olympic plates onto the pegs without bumping into neighboring lifters.
Dumbbell racks often become the biggest bottleneck in any health club. Implement the “3-foot rule” by ensuring three feet of open floor space exists between the rack and the start of the adjustable bench lineup. This prevents “bench-hogging” and allows members to move freely to swap weights. By respecting these pro-grade footprints, you create a rugged, professional-grade environment that feels spacious and operates with elite efficiency.
5 Steps to Designing Your Commercial Gym Floor Plan from Scratch
Designing a world-class facility requires a phased approach that most generic guides overlook. You can’t simply guess where a machine fits; you need a systematic process to ensure every square foot generates value. This commercial gym layout planning guide breaks the design phase into five actionable steps to help you move from a blank floor to a high-performance training environment.
- Step 1: The Perimeter Audit – Don’t just measure the floor. Use a laser measure to account for ceiling heights, HVAC ducts, and the exact location of every power outlet.
- Step 2: The Anchor Placement – Position your largest “anchor” units first. These include heavy squat rigs and your primary cardio line, such as Life Fitness treadmills.
- Step 3: Traffic Flow Mapping – Draw your primary arteries. Ensure there are no dead-ends and that members can move from the entrance to the locker rooms without cutting through a high-intensity lifting zone.
- Step 4: The “Ghost User” Test – Simulate your gym at full capacity. If 40 people are working out simultaneously, where do the bottlenecks occur? Adjust your spacing before you bolt equipment down.
- Step 5: Modular Future-Proofing – Always leave 10% of your floor space open. This allows you to adapt to new fitness trends or add a new functional trainer without redesigning the entire facility.
Measuring for Success
Precision is the difference between a professional health club and a cluttered basement. Start with a 1/4 inch scale drawing or a digital floor planner to visualize the space. Identify your “Fixed Points,” which are immovable objects like structural columns, doors, and water fountains. Clearance is the minimum distance between the outermost moving part of a machine and any obstruction. Failing to respect these fixed points leads to safety hazards and expensive layout corrections later.
Visualizing the Flow
Members naturally navigate a new space using the “Clockwise Rule,” typically moving to the right upon entry. You can subconsciously guide this traffic by using flooring changes, such as transitioning from high-impact rubber to synthetic turf. Always consider the “Secondary View.” This is what a member sees while resting between sets on their Body-Solid adjustable bench. If they’re staring at a blank wall or a cleaning closet, their perceived value of your gym drops. If you’re ready to start filling your floor plan with vetted, professional machinery, you can view our commercial equipment packages to secure the best ROI for your square footage.
Executing the Vision: How Gym Pros Streamlines Layout and Installation
Securing a professional floor plan is only half the battle. Executing that vision requires a partner who understands the mechanical nuances of high-end equipment. An integral part of any commercial gym layout planning guide is the transition from blueprint to physical reality. At Gym Pros, we specialize in bridging this gap by providing access to elite brands like Star Trac at a fraction of standard market rates. This financial advantage allows you to scale your facility’s capabilities without compromising on the quality of your machinery.
Our proprietary refurbishing process ensures that every unit performs at factory specifications. We don’t just clean the exterior; we conduct a rigorous 30-point inspection to verify the integrity of motors, belts, and electronics. This level of verification is critical because a layout is only as good as the reliability of the machines within it. If a unit goes down, your planned traffic flow is instantly compromised. For owners looking for a turnkey solution, our Commercial Gym Packages offer pre-curated equipment mixes designed to maximize ROI for specific square footages.
Maximizing Your Budget with Refurbished Gear
Selecting a refurbished Life Fitness treadmill isn’t just a cost-saving measure; it’s a strategic move to secure more “breathing room” in your total project budget. This extra capital can be redirected into high-density flooring or advanced lighting that enhances the “Savvy Insider” look of your club. Mixing new and refurbished units is a veteran strategy that maintains a pro-grade aesthetic while keeping your overhead manageable. Our 30-point inspection process guarantees that your layout won’t be ruined by frequent machine downtime or maintenance bottlenecks.
White-Glove Delivery and Installation
Professional installation is the final checkpoint for safety and performance. Certified technicians are essential for assembling complex multi-gyms and rigs that require precise torque and structural alignment. During the setup process, we calibrate each machine on-site to account for floor levelness, ensuring that your cardio equipment remains perfectly stable during high-intensity use. We perform a final walkthrough to adjust the layout in real-time for optimal flow. This ensures the theoretical “arteries” you designed in your commercial gym layout planning guide translate into an intuitive, high-performance experience for your members.
Engineer Your Facility for Maximum Performance
Success in the health club industry depends on the precision of your floor plan. This commercial gym layout planning guide has outlined the essential steps to transform a standard room into a high-traffic training hub. By prioritizing strategic zoning and calculating exact equipment footprints, you eliminate the safety hazards and bottlenecks that drive members away. You now have the strategies to balance aesthetic appeal with the rigorous demands of ADA compliance and high-volume usage.
Realizing this vision requires more than just a plan; it requires rugged, professional machinery that fits your budget. Our expert technicians bring over 20 years of industry experience to every project. We subject every piece of equipment to a proprietary 30-point refurbishment process, ensuring your facility operates with elite reliability from day one. With nationwide shipping and white-glove installation, we handle the logistics so you can focus on growth. It’s time to build your dream facility with a custom commercial package and secure your place as a savvy industry leader. Your members are waiting for a premium experience; start building it today.
Frequently Asked Questions
How much space do I need per member in a commercial gym?
Industry standards suggest allocating 25 to 35 square feet per active member on the training floor. While total facility capacity is often calculated at 10 to 15 square feet per member, the actual workout zones require more breathing room for safety. This commercial gym layout planning guide recommends higher allocations for functional zones where movement is more dynamic, ensuring members don’t feel crowded during peak hours.
What is the standard clearance between gym machines?
Primary walkways must maintain a minimum width of 36 inches to comply with safety standards and accessibility requirements. For specific equipment, ASTM guidelines mandate a clearance of 19.7 inches on both sides of a treadmill and 39 inches behind the belt. Providing these buffers protects your members from collisions and reduces your liability risks. Always prioritize these “dwell zones” when bolting down heavy strength units.
Do I need a professional architect for a gym layout?
You don’t typically need an architect for the equipment arrangement, but you must consult one for structural modifications or building code compliance. Architects handle load-bearing calculations and fire egress, which are critical for safety. However, an experienced equipment consultant is often better suited to design the training flow. They understand the “metabolic logic” of grouping machines and the specific footprints of pro-grade gear.
What are the most common gym layout mistakes?
Overcrowding the training floor is the most frequent error, as it creates bottlenecks and increases the risk of injury. Other common mistakes include ignoring the location of floor power outlets and failing to account for the “pedal swing” of ellipticals. Owners often place heavy free weights too close to cardio lines, which creates acoustic discomfort and disrupts the intuitive flow of the facility.
How do I plan a gym layout for a narrow or small space?
Focus on multi-functional units and vertical storage to maximize every square foot in a compact facility. Use adjustable benches and functional trainers that offer hundreds of exercise variations within a single footprint. Place taller units like StairMaster StepMills against walls to keep sightlines open. Mirrors are essential in narrow spaces to create an expansive feel and prevent the training environment from feeling claustrophobic.
Can I mix different equipment brands in one layout?
Mixing brands is a veteran strategy that allows you to secure the best-in-class machinery for each specific training zone. You can pair Life Fitness treadmills with Cybex strength pieces or Star Trac bikes without issue. To maintain a professional aesthetic, keep frame and upholstery colors consistent across your different brands. This creates a cohesive, high-end look while providing members with the most rugged and effective tools available.
What is the best flooring for a commercial gym layout?
High-density rubber is the industry standard because it provides the durability and shock absorption required for heavy commercial use. Use 8mm rubber rolls for cardio zones and thicker 15mm to 20mm tiles for free-weight areas to protect the subfloor. Synthetic turf is another excellent choice for functional training “pods.” It provides a clear visual cue for movement-based work and offers superior traction for sled exercises. To find the right solution for your space, you can explore Gym Flooring options that meet commercial-grade safety standards.
How often should I update or change my gym layout?
Evaluate your layout every 12 to 18 months based on member feedback and machine utilization rates. Minor adjustments keep the facility feeling fresh and allow you to address any emerging bottlenecks. A more comprehensive refresh is usually necessary every 3 to 5 years. This timeline allows you to integrate new fitness technology and adapt to the increasing demand for expanded strength and recovery zones.